A city plate is drawn for one printer: a 0.4 mm nozzle, at 1:5,000, printing flat on the bed. That is not a preference in the guide, it is how the model is made — nothing in it is thinner than the nozzle can lay down, every roof lands on a layer boundary, and every overhang carries itself. So most of what a slicer asks has already been answered. Here is what to set, and what the file has settled for you.
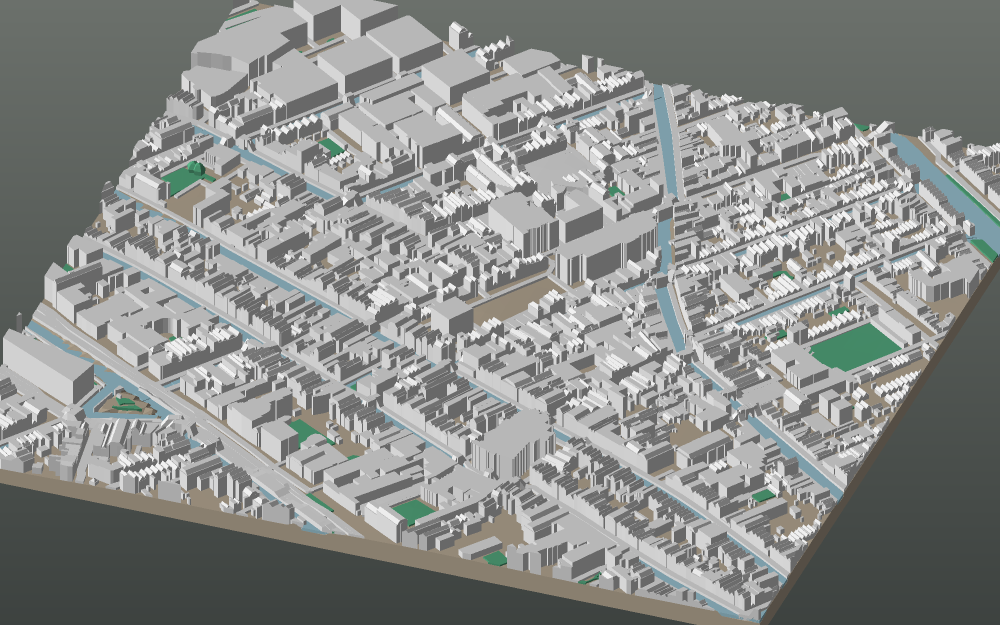
Layer height: 0.2 mm, and the model already knows it
The plates are built to a 0.2 mm layer. Building tops are snapped to that grid before the file is written, so a terrace of equal houses prints as equal houses rather than a near-miss staircase, and the ground is drawn to the same tolerance — nowhere does the printed surface leave the surveyed one by more than one layer. 0.16 mm works too and gives smoother walls; the roofs land where they land either way. Going coarser than 0.2 costs the detail the model was drawn to hold.
Nozzle: 0.4 mm, two walls
Everything on the plate is drawn to what a 0.4 mm nozzle can show. Streets are never narrower than the nozzle, monuments are widened rather than drawn true where their real dimensions would come out as a thread, and anything that stands tall on a small footprint is kept to at least 1.6 mm across — two perimeters each side, with a core between them. Two walls is the assumption the geometry was made under; three does no harm.
Supports: off
Turn them off, and leave the automatic ones off too. A city plate is almost entirely extrusions, which cannot overhang, and the two things that are authored rather than extruded — the drawn monuments and the bridges — are held to the same rule: no face further than about 45° from vertical, and a gap crossed by an arch rather than a lintel, so each layer oversteps the one below by a fraction of a nozzle and the span closes over air without ever printing on it. A slicer that offers to add supports under a bridge is offering something the bridge does not need, and at this scale nothing it adds could be picked off afterwards.
Four filaments, in this order
A plate never asks for more than four filaments. Each layer of the model is a separate part assigned to a slot, and two layers that share a colour share a slot:
- Slot 1, sand (#E8DCC0) — the base plate and the terrain.
- Slot 2, white (#FFFFFF) — the buildings and the roads.
- Slot 3, light blue (#A9D6E5) — the water.
- Slot 4, green (#5CB88A) — the parks and the trees.
A model with no water or no parkland in it simply uses fewer. The exact shades are a suggestion — any sand, white, blue and green read as the map — but keep the order, because the parts name their slot by number.
Open the 3MF as a project rather than importing it as a model. Bambu Studio, Orca and Creality Print read the filament colours out of the project file on Open Project and ignore them on Import Model; imported, the parts still land in the right slots, and the PRINT-GUIDE.txt in the same download says which colour each slot wants.
Orientation and adhesion
The files are in millimetres, Z-up, and already the right way round: print each plate flat on the bed exactly as it opens, with no scaling. The whole underside is one flat base, so the plate holds the bed on its own; a brim adds nothing but an edge to trim, and a raft would put a texture under the one face that has to be flat for the plates to sit level. Single-colour printers take the STL instead — one mesh per plate — or the OBJ, which carries the colour file beside it for anything that reads one.
More than one plate
Every plate of a grid is a square with flat edges, so neighbours butt up against each other and the streets run straight across the join. Lay the whole grid out dry first so the street grid lines up, then a thin bead of PVA or cyanoacrylate along the meeting edges is enough; a flat board underneath keeps the plates level while it sets. The print guide in the download draws the layout, with the north-west plate first and the rows running south.
What the guide in the box says
Every download carries a PRINT-GUIDE.txt written for that model: its plate size, its scale, how much the ground rises across it, which slots it uses, and the layout if it is more than one plate. It says the same things this page does, with your own numbers in them.
Passing it on
The film at the top of this page is free to use, and so are the words below it. Press Copy and it is on your clipboard. The film itself, the vertical cut for a phone and both posters are in the press kit on the launch post.
Settings reel — LinkedIn
Goes with the film at the top of this page. Upload the square cut natively rather than linking it.
Most of what a slicer asks about a 3D-printed city has already been answered before you open the file.

Not as a preference in a readme — as geometry. A GeoFilament plate is drawn for one machine: a 0.4 mm nozzle, 0.2 mm layers, printing flat at 1:5,000. So:

→ Layer height 0.2 mm. Building tops are snapped to that grid before the file is written, so a terrace of equal houses prints as equal houses instead of a near-miss staircase. 0.16 works too and gives smoother walls.

→ Nozzle 0.4 mm, two walls. Nothing on the plate is narrower than the nozzle can lay down. Anything that stands tall on a small footprint is widened to at least 1.6 mm — two perimeters each side, with a core between them — rather than drawn true and printed as a whisker.

→ Supports off, and leave the automatic ones off too. A city plate is almost entirely extrusions, which cannot overhang. The two things that are authored rather than extruded — the drawn monuments and the bridges — are held to the same rule: no face further than 45° from vertical, and a gap crossed by an arch rather than a lintel, so each layer oversteps the one below by half a nozzle and the span closes over air without ever printing on it.

→ Four filaments, never more. Sand for the base and the terrain, white for buildings and roads, light blue for water, green for parks and trees — two layers that share a colour share a slot. Any sand, white, blue and green read as the map, but keep the order, because the parts name their slot by number.

→ Flat on the bed, exactly as it opens, with no scaling. The whole underside is one flat base, so the plate holds the bed on its own: a brim is an edge to trim off, and a raft would put a texture under the one face that has to be flat for a grid of plates to sit level.

And every download carries a PRINT-GUIDE.txt saying all of it again with your own model’s numbers in it.

geofilament.mochi.is

Map data © OpenStreetMap contributors (ODbL)
Settings reel — Instagram, TikTok
For the vertical cut. A link is not clickable there, so the address is said rather than linked.
There is barely anything to set up.

A city plate is drawn for one printer, so the slicer has almost nothing left to decide:

0.2 mm layers — every roof already lands on one
0.4 mm nozzle — nothing on the plate is thinner than that
Supports off — every overhang carries itself
Four filaments — sand, white, blue, green, in that order
Flat on the bed — no scaling, no brim, no raft

Print more than one and they butt up square, so the streets run straight across the join.

geofilament.mochi.is

#3dprinting #3dprint #bambulab #orcaslicer #citymap #maps #cartography #architecture #makersgonnamake
One line
For a directory entry, a newsletter blurb or an app-store subtitle.
A GeoFilament plate is drawn for a 0.4 mm nozzle at 0.2 mm layers, so the slicer has almost nothing left to decide: four filaments, no supports, flat on the bed exactly as it opens.